
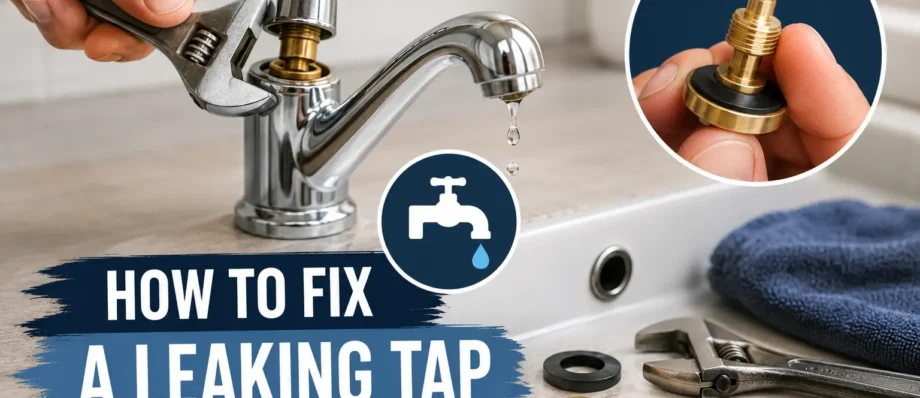
How to Fix a Leaking Tap: Step-by-Step Guide for UK Homeowners
- July 9, 2026
- Plumbers
- 8 mins read
A dripping tap might seem like a minor annoyance, but over time it can waste thousands of litres of water and increase your water bill. The constant dripping can also become frustrating, especially at night, and if left untreated, a small leak may develop into a bigger plumbing problem.
The good news is that many leaking taps can be repaired with basic tools and a little patience. Whether you have a traditional pillar tap, a mixer tap, or a modern ceramic disc tap, understanding the cause of the leak is the first step towards fixing it.
In this guide, you’ll learn:
- Why taps start leaking
- How to identify your tap type
- The tools you’ll need
- Step-by-step instructions to repair common leaks
- When it’s best to call a professional plumber
If you’re not confident carrying out DIY plumbing repairs, don’t worry. We’ll also explain when it’s safer and more cost-effective to hire an experienced local plumber.
Why Is My Tap Dripping?
Most leaking taps are caused by worn or damaged internal parts. These components gradually wear out through everyday use and eventually allow water to pass through even when the tap is fully closed.
Common causes include:
- Worn rubber washer
- Damaged ceramic cartridge
- Loose O-rings
- Corroded valve seat
- High water pressure
- Limescale build-up
- Ageing tap components
The exact repair depends on the type of tap installed in your home.
Identify Your Tap Type
Before starting any repair, it’s important to know what type of tap you have.
Compression Tap
Traditional compression taps usually require several turns to fully open or close.
These taps commonly use:
- Rubber washers
- Valve seats
- O-rings
They’re often found in older UK homes.
Ceramic Disc Tap
Modern taps usually use ceramic cartridges instead of rubber washers.
Characteristics include:
- Quarter-turn operation
- Smooth movement
- Longer lifespan
- Fewer leaks when properly maintained
Mixer Tap
Mixer taps combine hot and cold water into a single spout.
Leaks can occur because of:
- Worn cartridges
- Loose seals
- Damaged O-rings
- Internal corrosion
Tools You’ll Need
Most leaking tap repairs require only a few basic tools.
Prepare the following:
- Adjustable spanner
- Flat-head screwdriver
- Phillips screwdriver
- Allen keys (if required)
- Replacement washer or cartridge
- PTFE tape
- Soft cloth
- Small container for screws
- Silicone grease (optional)
Having replacement parts ready before starting can save time and avoid leaving your water supply switched off longer than necessary.
Step 1 – Turn Off the Water Supply
Before dismantling the tap, always isolate the water supply.
Most homes have isolation valves beneath the sink.
If not:
Locate your property’s main stopcock and turn it clockwise until the water stops flowing.
Next:
- Open the tap.
- Allow any remaining water to drain.
- Place a towel beneath the tap to catch any drips.
This prevents water from escaping while you work.
Step 2 – Remove the Tap Handle
The handle is usually secured by a small screw.
Depending on the tap design:
- Remove the decorative cap.
- Unscrew the fixing screw.
- Lift the handle away carefully.
Some taps use hidden Allen screws underneath the handle.
Avoid forcing components, as older fittings may become brittle over time.
Step 3 – Inspect the Internal Parts
With the handle removed, you’ll be able to access the working components.
Look for signs of:
- Cracked washers
- Flattened rubber seals
- Corrosion
- Limescale
- Damaged cartridges
- Loose retaining nuts
If any parts appear worn or damaged, replacing them is normally more effective than attempting temporary repairs.
Fixing a Compression Tap
Compression taps are among the easiest to repair.
Remove the Valve
Using an adjustable spanner:
Carefully unscrew the valve assembly.
Take note of the order of each component to make reassembly easier.
Replace the Washer
The rubber washer is usually located at the bottom of the valve.
If it appears:
- Split
- Flattened
- Hardened
- Cracked
Replace it with a matching size.
Using the wrong size washer may cause the tap to continue leaking.
Check the Valve Seat
The valve seat is where the washer presses to stop the water flow.
If it’s rough or corroded:
The new washer may wear out quickly.
Minor damage can sometimes be smoothed using a valve seat dressing tool, while severe corrosion may require replacing the tap.
Fixing a Ceramic Disc Tap
Ceramic taps don’t use traditional washers.
Instead:
They contain a ceramic cartridge.
Remove the Cartridge
Unscrew the retaining nut and carefully lift out the cartridge.
Compare it with the replacement before fitting the new one.
Cartridges vary by manufacturer, so matching the model is important.
Install the New Cartridge
Position the replacement cartridge correctly.
Tighten the retaining nut securely, but avoid over-tightening as this can damage internal components.
Reattach the handle once everything is in place.
Cleaning Away Limescale
Hard water areas across the UK can cause limescale to build up inside taps.
If you notice white deposits:
Soak removable metal parts in white vinegar for around one hour.
After soaking:
- Brush away residue.
- Rinse thoroughly.
- Dry before refitting.
Avoid soaking rubber seals or ceramic cartridges unless recommended by the manufacturer.
Reassemble the Tap
Once repairs are complete:
- Replace all internal components.
- Tighten fittings carefully.
- Reattach the handle.
- Replace decorative caps.
Double-check that every part has been fitted in the correct order before restoring the water supply.
Turn the Water Back On
Slowly reopen the isolation valve or main stopcock.
Check carefully for:
- Leaks around the tap body
- Water escaping beneath the sink
- Drips from the spout
- Loose connections
Turn the tap on and off several times to confirm the repair has been successful.
If the leak continues, the problem may involve deeper internal damage or require a replacement tap.
When Should You Replace a Tap Instead of Repairing It?
While many leaking taps can be repaired by replacing a washer or cartridge, there are times when replacing the entire tap is the smarter option.
Consider replacing your tap if:
- The tap is over 15–20 years old.
- Spare parts are no longer available.
- The tap body is cracked or heavily corroded.
- The leak keeps returning after multiple repairs.
- The tap is difficult to operate.
- You are renovating your kitchen or bathroom.
Modern taps are generally more water-efficient, easier to maintain, and available in a wide range of styles to suit your home.
Common Mistakes to Avoid
Many DIY tap repairs fail because of simple mistakes.
Using the Wrong Replacement Parts
Not all washers and cartridges are the same size.
Always take the old part with you when buying a replacement or check the manufacturer’s model number.
Overtightening Fittings
Applying too much force can damage threads, crack fittings, or make future repairs more difficult.
Tighten components until they are secure, but avoid excessive force.
Forgetting to Turn Off the Water
This is one of the most common DIY mistakes.
Always isolate the water supply before dismantling any plumbing fixture.
Losing Small Components
Keep screws, washers, and other small parts in a container while working.
Replacing missing parts can delay the repair.
Ignoring Small Leaks
Even if the drip slows down after a repair, it shouldn’t be ignored.
A properly repaired tap should stop leaking completely.
How Much Does It Cost to Repair a Leaking Tap?
If you prefer to hire a professional plumber, the cost is usually affordable.
Typical UK repair costs are:
| Repair | Average Cost |
|---|---|
| Replace tap washer | £60–£100 |
| Replace ceramic cartridge | £80–£150 |
| Replace mixer tap | £90–£220 (excluding tap) |
| Emergency leaking tap repair | £100–£200+ |
Prices vary depending on your location, the type of tap, and whether the repair is carried out during normal working hours or as an emergency call-out.
Can a Leaking Tap Increase Your Water Bill?
Yes.
Although a single drip may seem insignificant, it can waste a surprising amount of water over time.
A continuously dripping tap can waste thousands of litres of water each year, increasing your water bill and putting unnecessary pressure on water resources.
Fixing a leak promptly is often one of the easiest ways to reduce household water waste.
How to Prevent Taps From Leaking
Regular maintenance can help extend the life of your taps and reduce the chance of future leaks.
Good habits include:
- Avoid forcing tap handles closed.
- Clean limescale from taps regularly.
- Replace worn washers before they fail completely.
- Check under sinks for early signs of leaks.
- Address dripping taps as soon as they appear.
- Use quality replacement parts when carrying out repairs.
Small preventative measures today can help avoid larger plumbing problems later.
When Should You Call a Plumber?
DIY repairs aren’t always the best solution.
You should contact a qualified plumber if:
- The leak continues after replacing the washer or cartridge.
- Water is leaking from the base of the tap.
- The tap is badly corroded.
- Pipes beneath the sink are leaking.
- You cannot isolate the water supply safely.
- The repair requires specialist tools.
- You’re unsure how to dismantle the tap.
A professional plumber can diagnose the problem quickly and complete the repair safely, reducing the risk of further damage.
Frequently Asked Questions
Why is my tap still dripping after changing the washer?
The valve seat may be damaged, the replacement washer may be the wrong size, or another internal component such as the O-ring or cartridge could be worn.
Can I fix a leaking mixer tap myself?
In many cases, yes.
Replacing a ceramic cartridge is often a straightforward repair if you have the correct replacement part and basic DIY skills.
How long does it take to repair a leaking tap?
Most simple repairs take between 30 and 60 minutes.
More complex repairs or complete tap replacements may take longer.
Is it safe to use a leaking tap?
Yes, but delaying repairs can waste water and may allow the leak to worsen over time.
It’s usually best to repair the problem as soon as possible.
Should I repair or replace my tap?
If the tap is relatively new and the problem is limited to a washer or cartridge, repairing it is usually the most cost-effective option.
If the tap is old, corroded, or repeatedly leaking, replacement may provide better long-term value.
Final Thoughts
A leaking tap may seem like a small problem, but fixing it early can save water, reduce household bills, and prevent more serious plumbing issues.
Many common leaks can be repaired by replacing a worn washer or ceramic cartridge, making this a practical DIY task for confident homeowners.
However, if the leak persists, the tap is badly damaged, or you’re unsure how to proceed, it’s always worth seeking professional help.
Our plumbing directory makes it easy to find trusted local plumbers across the UK, compare services, and request quotes from experienced professionals near you.

